![]()

![]()
GSA Golf system minimum PC requirements
 -
-
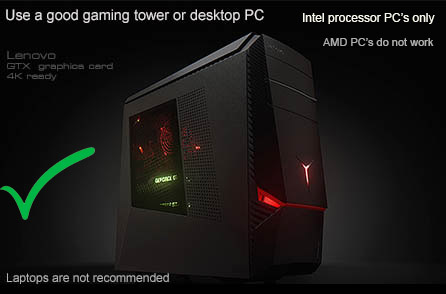
Intel i5 or above Processor with a desktop gaming PC
Warning! Do not use PC's with AMD processors or low cost Laptops!
8GB RAM Nvidia 1070 Graphics Card or equivalent
25GB of Hard Drive Space
Windows 10 or 11 (Required)
Internet Connection
(Required if using 3rd party game software such as E6, TGC or GSPro)
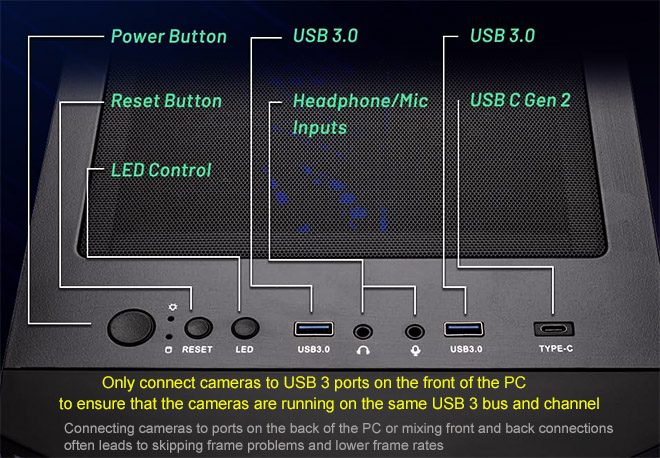
2 x USB3.1 or 2 x USB3.2 ports (Required)
Note: The cameras are USB3 cameras
and will only run at the correct speed when connected via USB3 cables directly to separate USB3 ports on the PC
Warning
If using 2 cameras, do not connect the cameras together with a Hub !
All cameras must be directly connected to separate USB3.1 ports on the PC
Use only the supplied powered USB3 extension cables
![]()
Warning! Do not use older PC's that have been modified in anyway
(i.e. new mother board, additional USB3 cards etc)
Experience has shown that the high-speed cameras do not function with such older or modified PCs
![]()
Cable Warning
Do not add any additional USB3 cables to the already supplied powered 40ft cables
Cameras will either not run at all or the connection will be unstable in this case
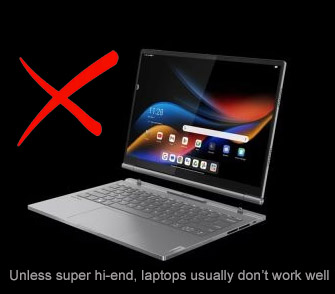
Warning : Laptops not recommended
Laptop PCs are usually not powerful enough to run the high speed cameras and the gaming software (i.e. E6. TGC, Gs pro etc)
as the demand on the graphics card will be quite great and updating graphics cards on Laptops may not be possible.
Step by Step Camera Installation
![]()
Step 1
Camera driver installation
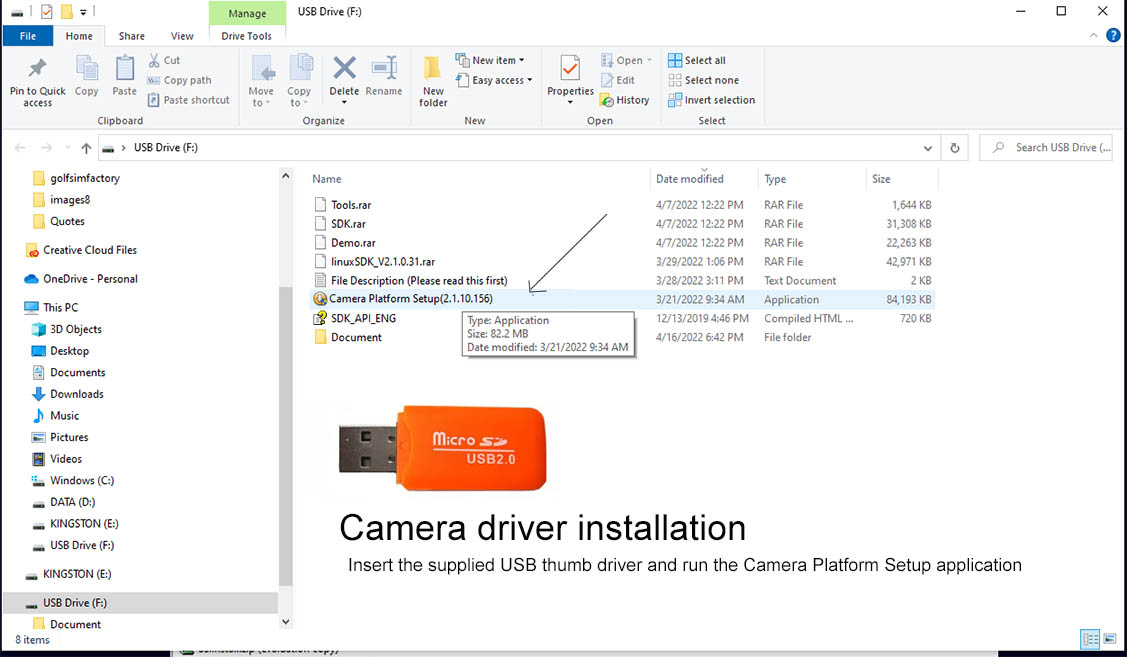
Click the above image to download the camera driver setup if you don't have the thumb drive
Step 2
Install the Control Panel (CP) software
Follow the download links sent to you via email
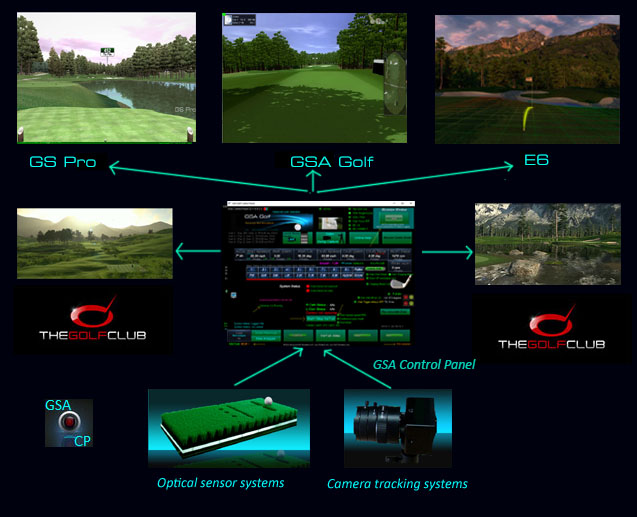
The GSA Golf Control Panel (CP) interfaces the cameras to the game software
and performs all the camera image processing to calculate the shot data
Error message when first starting the CP ?
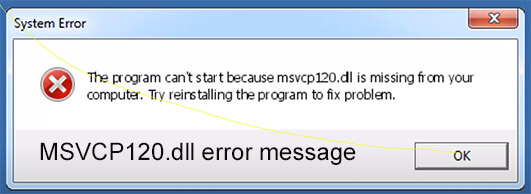
If you see the above error message when first starting the Control Panel (CP)
then your PC requires the VC Redistributable files.
Click on the above image to see an installation video
Download VC redistributables hereHere
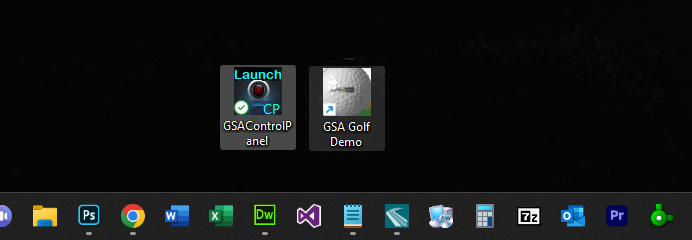
After the Control Panel (CP) installation, you should see a desktop icon on your PC
Click to launch the CP
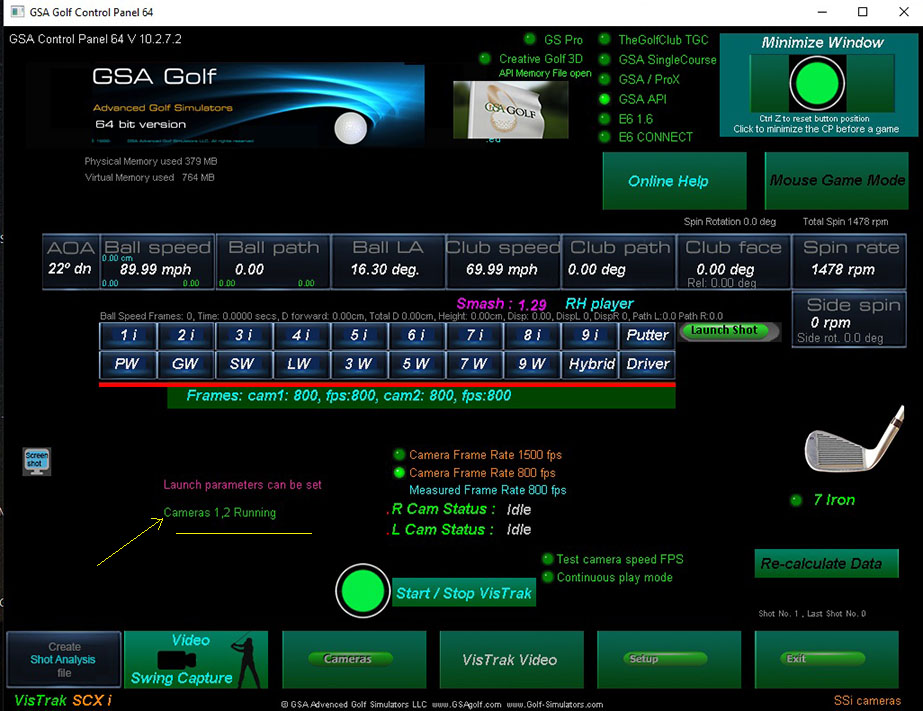
The CP main window
Depending on what system you have, you should see either 1 or 2 cameras are running
Auto camera FPS speed checks
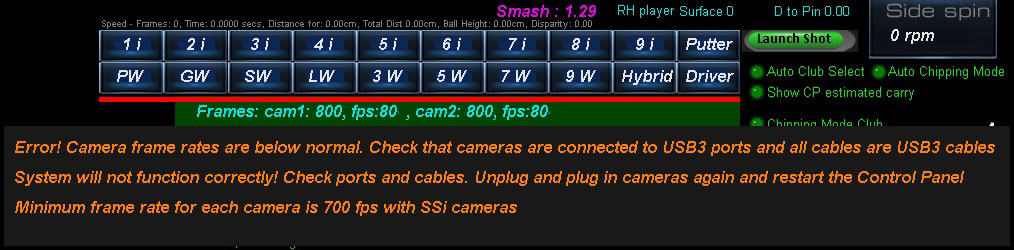
When starting the CP with the cameras connected, a speed check will be performed.
An error message will be displayed if the speed is below the 700 fps minimum.
If checked camera speeds are below the minimum, then this is usually due to either the cameras not being connected to USB3 ports on the front of the PC
or USB 2 extension cables are being used.
Switching camera frame rate from 800 fps to 1500 fps

You can now switch the camera frame from 800 fps to 1500 fps in each camera for a combined frame rate of over 3000 fps !
Benefits: You'll see double the number of frames of the ball in flight in the shot video playback and ball spin can be measured.
Step 3
The CP setup window
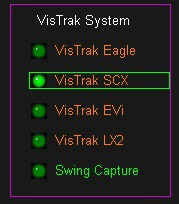
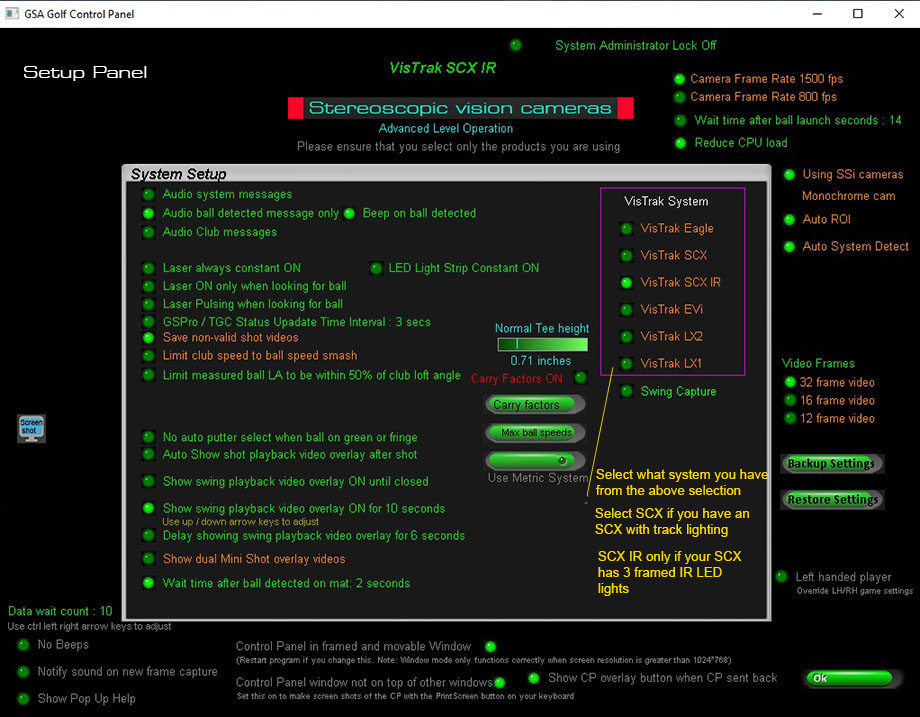
Click the "Setup" button from the CP's main panel and select the system you are using.
Usually either SCXi, Eagle, LX2 or EVi.
Step 4
Running the cameras
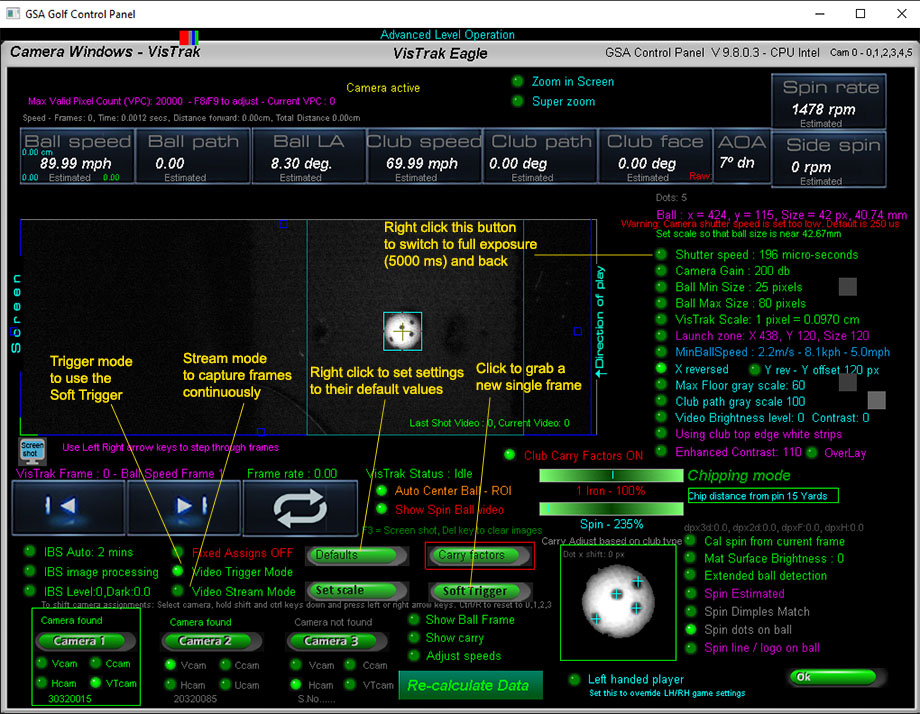
The CP Camera window
Click the "Cameras" button from the CP's main panel
Right Click on the "Defaults" button to set all settings to their default values
Switch the "Video Stream Mode" ON to start grabbing fames continuously.
If you only see black or very dark images, right click on the "Shutter Speed" button to set the camera to full exposure.
Note that full exposure mode (i.e. 5000 ms shutter speed) is only used to help orientate the cameras if images appear dark.
Regular shutter speed is 300 ms with lighting pointing directly at the ball.
![]()
Step 5
Lens focusing and aiming
This step not required if using an LX2 as cameras are already focused.
It's important that the camera lenses are in focus.
The lenses are pre-focused before shipping though.
To focus, place a ball on the center line of the enclosure and point the camera at the ball.

Switch to "Video Steam Mode" in the CP's camera window so that you see the captured images.
Rotate the outer dial on the lens in or out until you see that the ball is in focus.
![]()
Step 5
Aiming the Camera and Lights
This step not required if using an LX2 as cameras are already aimed.
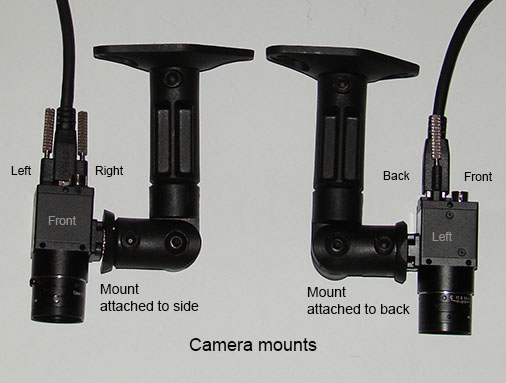
Depending on which side of the camera the mount is attached,
cameras may have to be rotated in order to obtain the correct orientation
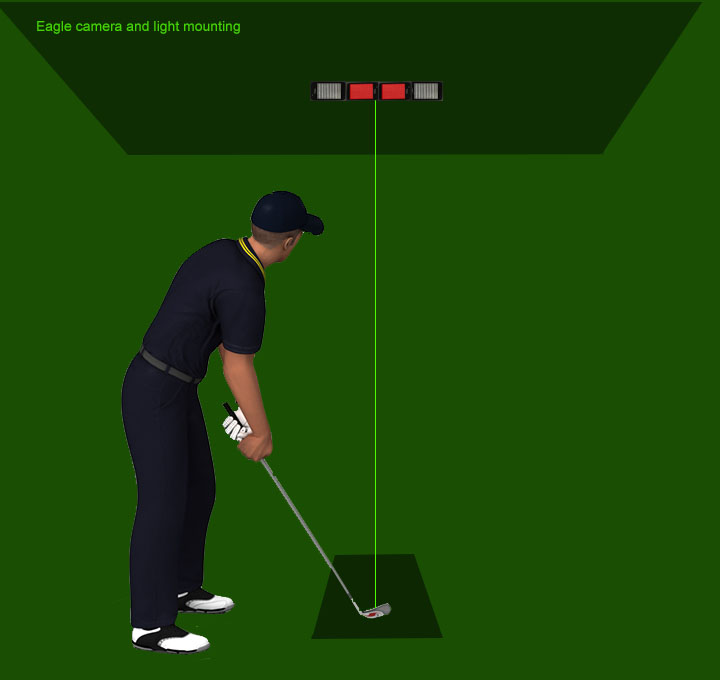
If using the Eagle Panel version, tilt the panel down on its mount so that it points back to the hitting position on the mat.
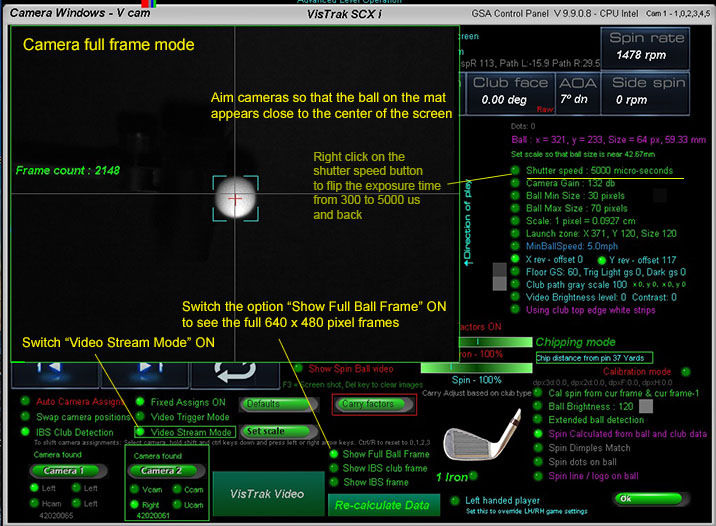
When aiming cameras, switch the options "Show Full Ball Frame" and "Video Stream mode" ON
![]()
SSi Cameras
Using the HuaTeng Vision application to check the cameras
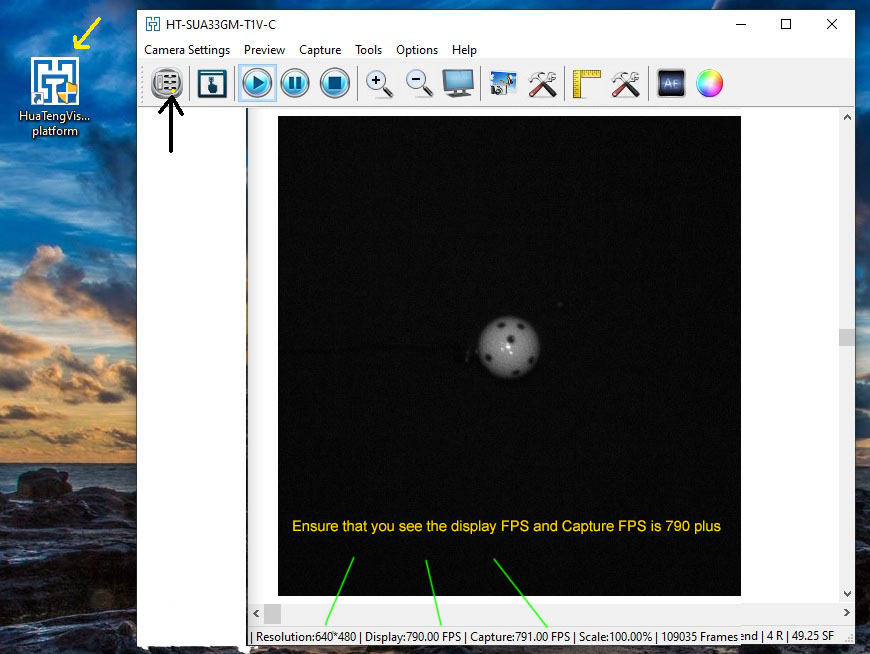
You can use the HuaTeng Vision application to check that the SSi cameras on your PC are running at the correct speed
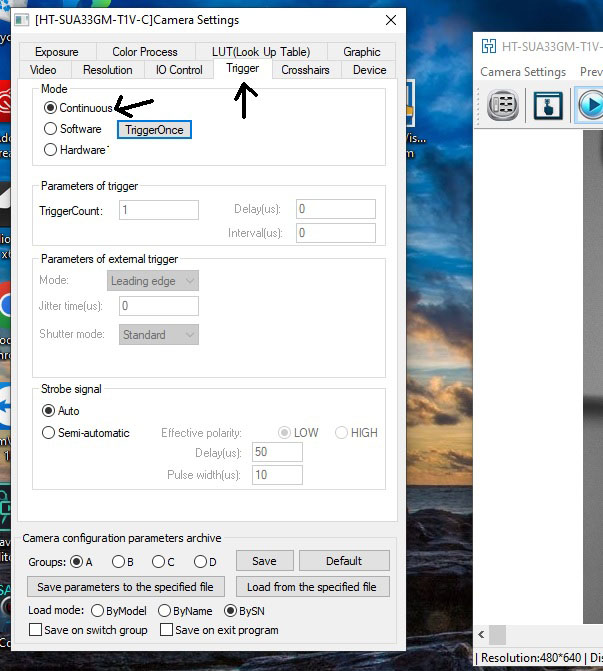
Select "Continuous" in the Triiger panel to start grabing frames
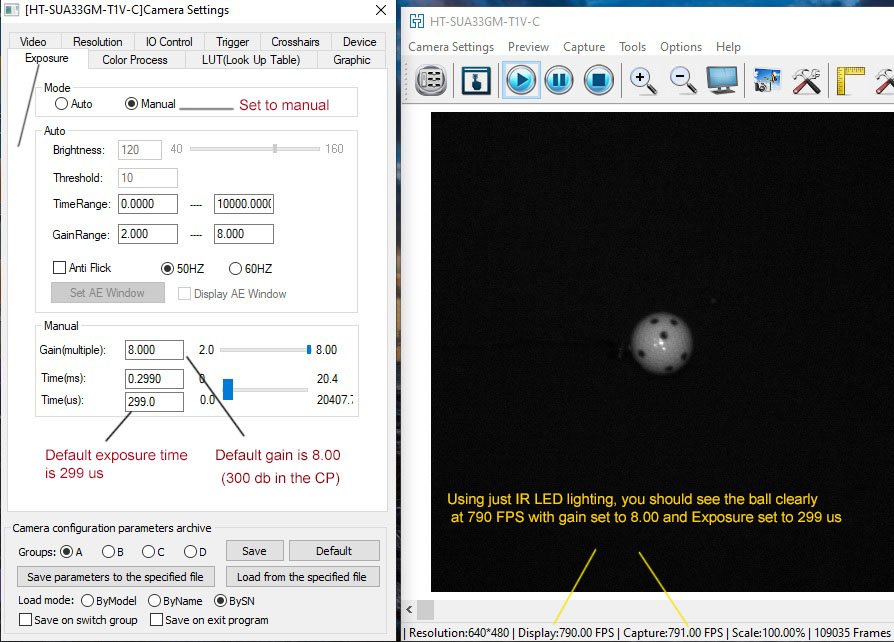
Select "Manual" in the Exposure panel.
Set gain to 8.00 and Exposure time to 299 us
![]()
Fault finding and Issues

![]()


Click the above buttons for more specific system information
![]()
 Home
Home Simulators
 Cameras
 Software
 Enclosures
 ProTee
 E6 Courses
 Business
 Tech News